Silly me! I finished this project so fast that I almost forgot to write about it!
After choosing some fabric for the belt, I cut them up into varying widths.
Then I chain pieced them together.
Then I chain pieced them together.
I cut the fusible interfacing to the dimensions I wanted, then ironed-on the fabric. This step probably took the longest amount of time. I wanted to make sure that the fabric was fused to the interfacing, since there'd be a lot of wear and tear on the belt.
 |
| Very stiff interfacing! |
When it comes to tools, I often go back and forth about buying them. On the one hand, they can help speed up a tedious task or make easy an arduous one. On the other hand, it's another thing that needs to be stored, not to mention the money that is spent on something you would use once in a blue moon.
 |
| Ah, what I wouldn't do for a mini iron right now. |
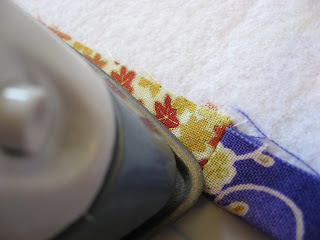
The Clover Mini Iron is one of those tools that I've been thinking about buying, but then when I go to buy it, I stop myself and wonder if I would actually make use of it. Well, after this project I'm convinced that I need to get one. One of the steps for this belt was to fold over and press 1/2" of fabric onto the interfacing. I used my normal sized iron to do that, and the tips of my poor little fingers got nearly burnt the entire time I pressed the 1/2".
 |
| One final press and then on to the sewing machine. |
For the topstitching I wanted to go with a thread that would bring out some of the gold highlights that were in most of the fabrics, like some metallic thread. I didn't have any regular thread like that, but I did have some embroidery thread that would do the trick. Embroidery thread is not as hefty as regular sewing thread, but since it was for a belt and not a regular garment, it would work just fine.
The needle had to go through several layers of heavy interfacing, and at one point the thread got so tangled in the bobbin case that I had to unscrew the needle plate to remove the thread. I was horrified by what I saw:
 |
| Be afraid. Be very afraid. |
Forget dust bunnies! There was enough dust underneath that plate to make an army of dust kangaroos! I have to admit, I haven't cleaned underneath the needle plate since I got the machine, although I did buy a set of vacuum attachments made specifically to clean small areas like the caverns of a sewing machine, but I haven't pulled that out since buying it a year ago (talk about buying tools that I don't use!). So I cleaned out the dust and continued topstitching the belt.
 |
| One more stitch and then fini! |
I'm not sure why, maybe it was the heavy duty interfacing, but I was expecting this project to take a lot longer than it did. But just like that, the belt was done!


Love how this came out. The material choice is great.
ReplyDelete